Sourdough Bread Baking: from Starter to Finished Loaf
Sourdough baking is not a specifically Jewish tradition - all food cultures that involve bread began with naturally leavened forms, and commercial yeast didn’t appear until the 19th century. Just about any type of bread can be made with a sourdough starter. While this set of recipes and videos are a guide to making the most basic, elemental loaf, composed of just flour, water, and salt, we can build on these skills (after Passover) to explore naturally leavened rye loaves, bagels, challah, and more.
This is not a quick process - it’ll take at least four days from start to finish, and may take as long as a week if the starter takes a while to get going. Most of this time is spent waiting and occasionally checking. Sourdough baking really isn’t difficult in the way that dunking a basketball is hard - it doesn’t require a special ability or extraordinary coordination. Cultivating and maintaining a starter is more like having a pet - it will need your time and attention at a few key moments, but the routine will become second nature pretty quickly.
There is a step-by-step video for (almost) every step, simply click the blue title for the link.
Making the Starter
On day one the process couldn’t be simpler:
Add equal parts bread flour and room temperature water to a nonreactive container, stir to combine, and cover.
For accuracy, I’d recommend using a scale if at all possible. I like to start with 100 grams of each and use a plastic deli container (like you’d get takeout soup in) since it’s a good size and comes with a lid. A glass jar with a lid will also work well.
If you don’t have a scale, use 2/3 cup of bread flour and just under 1/2 cup of water.
Once it’s mixed, leave it covered on the countertop and wait till tomorrow.
Feeding Your Starter
When you check your starter on day two, there may be a bit of bubbling and a hint of sweet, sour odor. The starter may have even risen a bit higher in its container. Any of these developments are signs that something is happening! Don’t worry if it seems like
It’s alive and it smells a little sour and it’s bubbling up a little higher than yesterday!
discard most of it (about 80%) and feed it another 100 grams each of flour and water.
How to Mix the Dough
Once the starter is active and healthy, it can be used to make some dough. For best results, try and bake with a starter that was last fed 12 hours before the dough is mixed.
There are a few indicators that a starter is ready for baking:
Healthy starters have a sour, funky smell - like overripe fruit, and a little boozy, but not like rot or rubbing alcohol. Starters should smell good!
There should be a good amount of bubbles forming. If the starter is 100% hydrated (meaning equal parts flour and water) it may be so runny that it resembles pancake batter, but if the starter is a little less hydrated, the bubbling will cause it to grow dramatically in volume. Regardless of hydration, a healthy starter is actively bubbling.
Try the “float test” by dropping a small piece of your starter in a bowl of water. If it floats, it’s ready for baking. An important note on the float test: runny starters will not float, but it is a valid test for stiffer, less hydrated starters.
If your starter is ready to go, here’s what you’ll need to mix the dough:
3/4 cup starter
1 cup + 1 tablespoon water, at room temperature
3 1/2 cups flour (ideally bread flour)
1 1/4 teaspoons fine sea salt
Pour the water into a medium bowl and add the starter. Stir until well-combined.
In a separate container combine the flour and sea salt, then add them to the water and starter mixture.
Use a spatula or wooden spoon to stir the dough, then mix by hand until all the flour has been absorbed and no dry spots remain.
Cover the dough and let it rest for 30 minutes. After the rest period, knead it a bit to develop the gluten by folding it over itself, turning it 90 degrees, and folding it over itself again. Complete a total of 4 folds. Let it rest another 30 minutes and repeat, followed by another 30 minute rest and round of kneading- a total of 3 over the course of 90 minutes.
After completing the three rounds of folding, cover and lest rest for about 12 to 18 hours. We are looking for the dough to become at least 1.5 times its original size during this time. If it rises very quickly, you can refrigerate it to slow the rise. Time is important as it long, slow fermentation helps the dough to develop depth of flavor.
Forming the Loaf
Once the dough has completed its bulk rise, it’s time to form the loaf.
Lightly flour a clean countertop and gently remove the dough from it’s container, taking care not to flatten the dough.
From here it can get a bit difficult to explain without a visual, so it will be easiest to watch the video prior to shaping. I will do my best to put the process into words as well. Here we go:
Gently stretch the dough so that it forms a sort of rectangular shape, with the narrow side parallel to you. Reach to the far end of the dough and fold about one third of it over itself, like you would fold paper for a letter. Throughout this process, try not to get the flour from the surface mixed into the dough as it can create dry spots if there’s too much of it.
Next, take the end that’s closer to you and fold it back over the dough, so that what had been the side closest to you is now on top of the far side.
Turn the loaf 90 degrees and roll it over itself like you’re rolling a sleeping bag. At this point the loaf should resemble a burrito - a log-like shape with visible seams on both ends. The goal at this point is to tuck all of the seams on the dough ball onto the bottom. Imagine a balloon - the entire surface is round and smooth, with just one opening on the bottom. To do this, gently slide your hand along the work surface, tucking the seams of the dough under the center until you can’t see any seams anymore (they still exist but should be on the underside) and the dough has become a smooth ball.
Flour a dry, clean towel and place it in a medium bowl. Place the dough in the bowl, with the seam-side up. Cover and let proof until the dough has nearly doubled in size, about 3 to 4 hours.
Throwing the Loaf in the Oven
Half an hour before baking, add an inverted baking sheet (or pizza stone) to your oven’s center rack and set it to 500°F.
Meanwhile, bring a saucepan or small pot of water to a boil.
When the oven is ready, tear off a piece of parchment slightly smaller than the baking sheet and place it on your countertop. Invert the bowl with the dough and gently place it on the parchment. Dust off as much excess flour as possible.
Next, place the boiling water in the oven’s lower rack and close it.
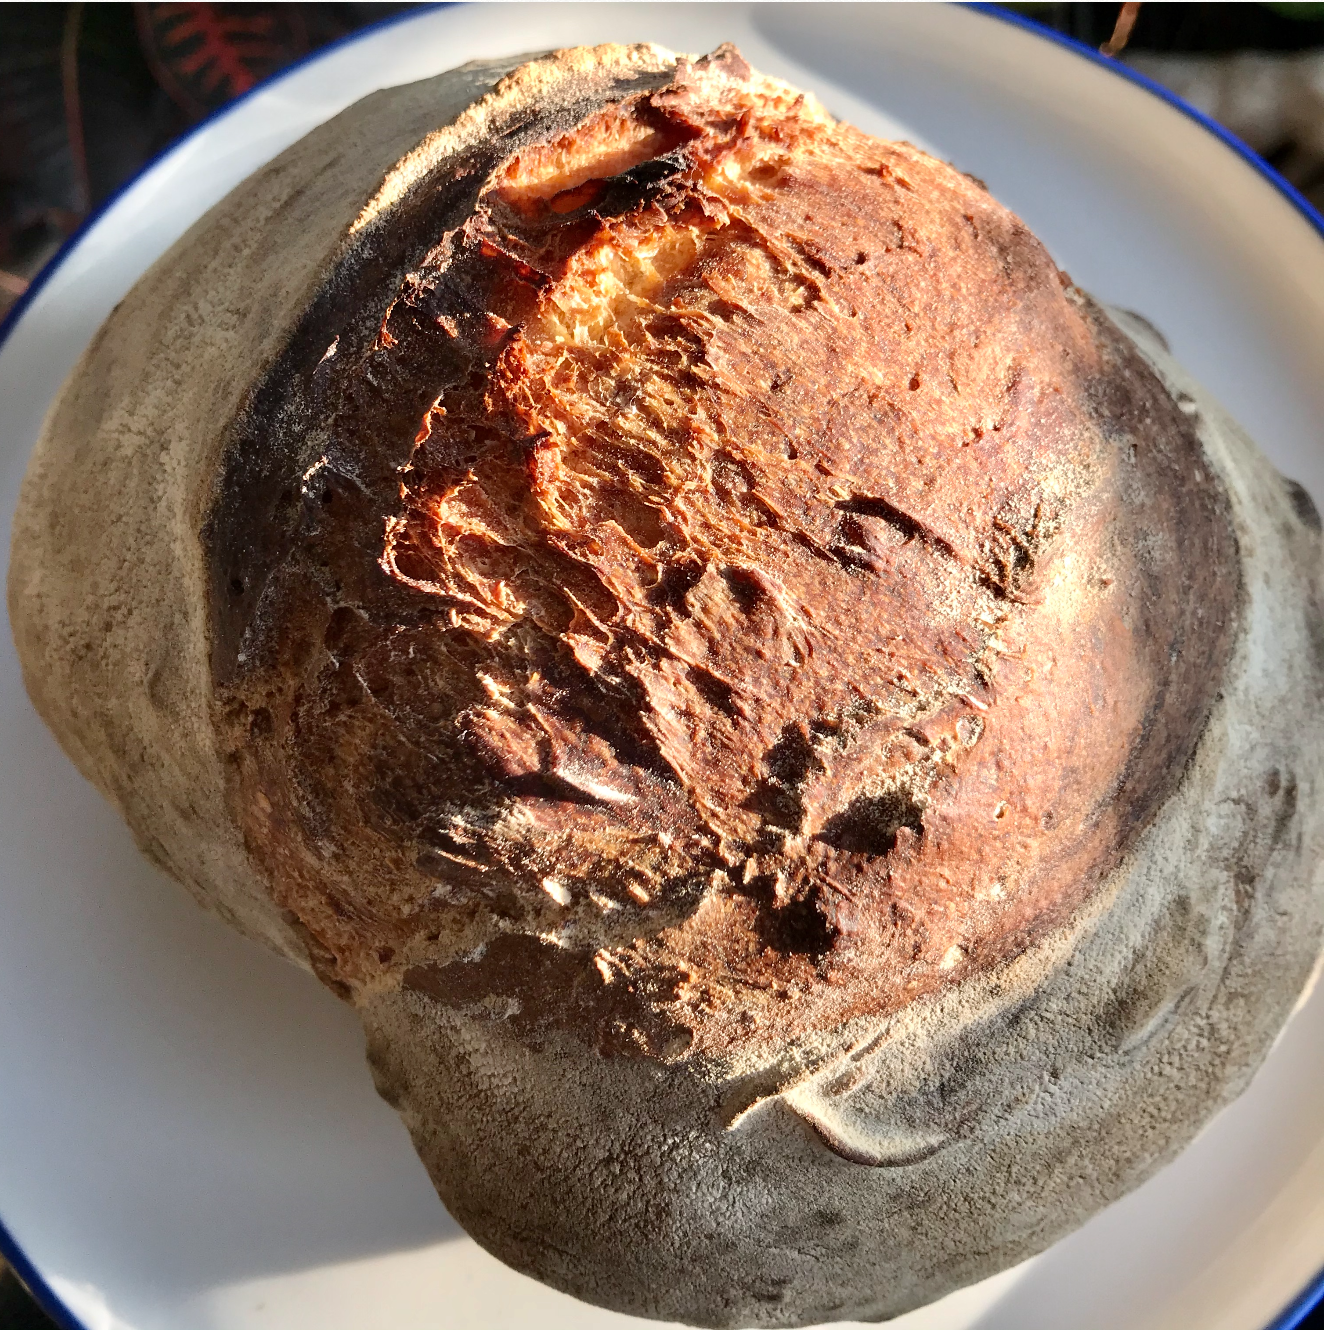
Next, use a serrated knife to score the loaf. This step is partly decorative but is very important to allowing the bread to rise in a controlled way that prevents both dense loaves and blowouts in which the bread tears in irregular ways. To score the loaf, plate the knife at a slight angle - not quite vertical, and cut across the entire length of the loaf. Ideally, this cut will run through the loaf’s center and will be about 1/4” deep.
Add this loaf to the oven immediately and set a timer for 30 minutes.
Final Turn
After 30 minutes of baking, open the oven and turn the loaf around.
Remove the pot or saucepan of water.
Close the oven and continue baking for about 20 to 25 more minutes, until the crust is a deep brown color with some charring around the edges. Remove the bread and place it on a wire rack to cool. Bread continues baking due to residual heat so wait at least an hour to cut into it.